IN THIS ARTICLE:
Schedules allow you to play specific content only when you need it. This could be scheduling content for lunch or break times, parents' evenings, open days, or even rotating content like menus or week A/B messaging.
Viewing Schedules
Keeping track of your schedules is easy. Calendar view gives you a week at a glance, and list view shows you everything in one view. Pick the option that you prefer.
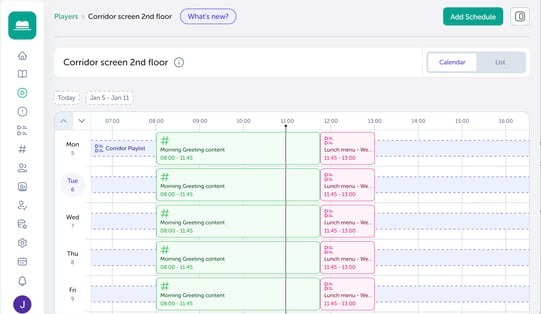
Viewing as a Calendar
In this view, your schedules display as a calendar, showing all existing schedules for the current day.
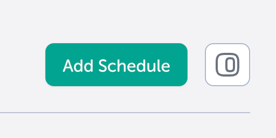
Click on either the white section of the Calendar or the Add Schedule button in the top right corner of the page to add a new schedule. To add a schedule to a different day, use the arrow buttons or date picker to jump to a specific date.
Viewing as a List
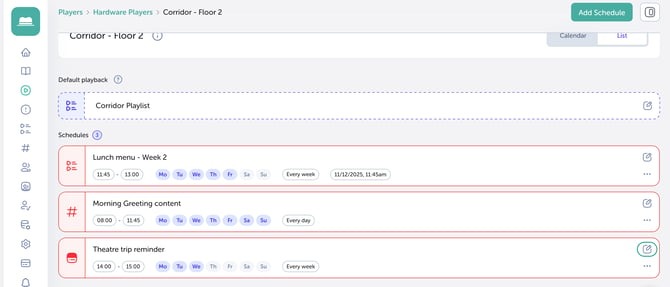
List view shows your schedules in a scrollable List, displaying all upcoming schedules.
To add another schedule, just click the Add Schedule button in the top right corner of the page.
Creating a Schedule
-
Go to Players, click the Player you want to run the schedule on.
-
Click on either the white section of the Calendar or the Add Schedule button in the top right corner of the page.
-
In the window that opens, you can choose:
- Schedule on/off
- Start+end date
- Repeat
- Repeat every
- Active from/to
- Colours
- Selecting content
- Once you have made your changes, click confirm to set your schedule.
Choosing which content to display
Using the Content dropdown in the top right of the editing window, you can choose to play either a Category, Playlist or Single content item:
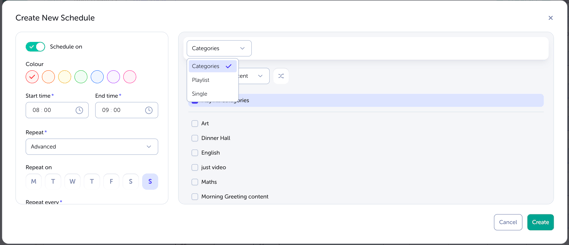
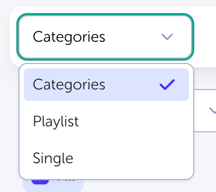
Categories: Select 1 or more categories from your list to playback. You could use categories based on subject areas, or create a Category for each screen and assign videos to those. You can also set a limit on the number of videos from those categories to playback. This allows you to only show fresh new content by setting a low number limit.
Playlists: Playlists let you pick and choose selected videos to playback in a chosen order. Create a Playlist from the menu, and click to add your videos. These Playlists are then available to you when you configure your Player devices.
Single: Choose a single item to play back in a loop; this works well for a promotional video on an event day.
Choosing the frequency of your Schedule
Changing how often your schedule displays allows you to plan your content to show when you need it and how often:
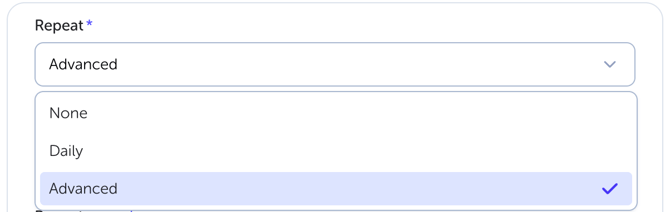
None: Used for one-time schedules that don't need to repeat.
Daily: Will be repeated daily, including weekends.
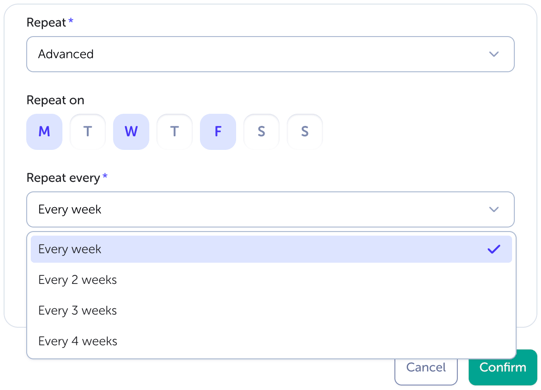
Advanced: Advanced schedules allow you to choose which days of the week the schedule plays, and the frequency at which it is repeated.
To create an Advanced Schedule, follow the steps above and choose Repeat>Advanced, which will display days of the week and options for how often the schedule should be repeated:
Editing a schedule
Editing in Calendar View
Updating schedules is easy, simply click on a schedule to open the Edit schedule window, make your changes and click Confirm to save: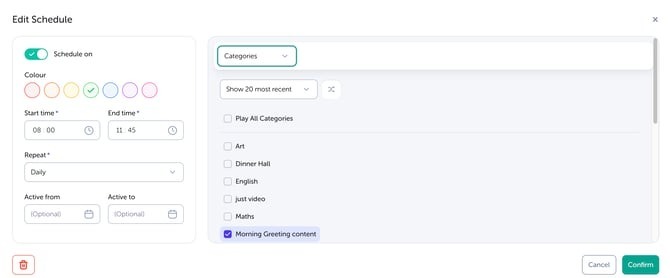
NOTE
Copying a Schedule to another Player can only be done when in List view. Find your Schedule, click the 3 dots to the right and then click Copy Schedule to.
Editing in List view
Easily update each schedule by clicking the Edit icon on the right-hand side:
NOTE
Any changes made will also affect all the repeating versions of that schedule; there is an undo option if you make a mistake.
Setting Schedule Colours
Schedules can be assigned a colour for easy identification, great for indicating things like the category or which team the schedule belongs to!
To edit colours, head to the Schedule you’d like to update and open the Edit Options window. Here, you’ll find 7 colour options to choose from:
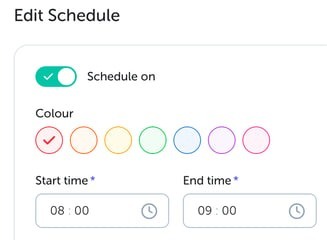
Once you’ve made your changes, click Save to confirm your update.
NOTE
- You can create as many schedules as you like - when a schedule isn't set, the Player will revert to Default playback.
- Schedules with overlapping times will use the schedule that has started most recently. For example, if you set a 10 am to 11 am schedule, and a 10.30 am to 11 am schedule, at 10.30, the second schedule will take over playback from the first.